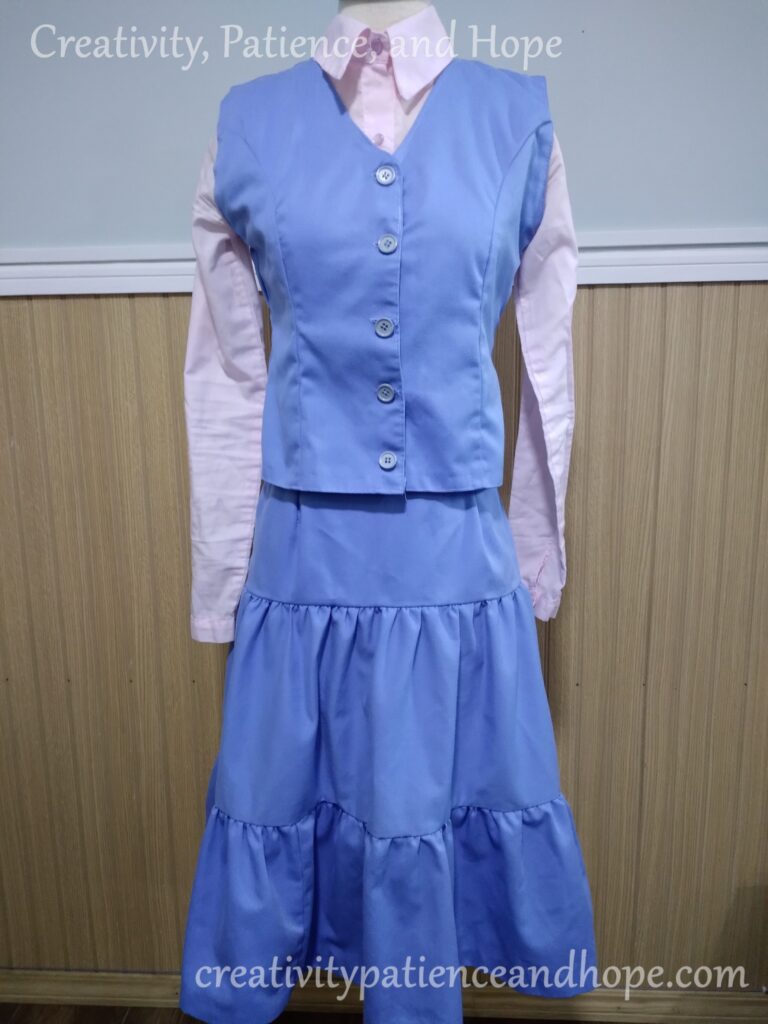
So I previously posted about my sister’s first sewing project, her first skirt. After making that basic A-line skirt, the next project we were given was a bit more complex: a tiered skirt. For some reason, it was decided that all three of us would make our skirts out of the same fabric. I don’t recall the details of it, nor who exactly decided, but I do remember our mother accompanying the three of us to shop for fabric. At this point, I’m not really sure why it was that she went with us. In the end, a light blue gabardine fabric was chosen for our skirts, with enough to also make matching vests.
For this post, I’m showing the pictures of my younger sister’s project. I’ll also mention that my project was exactly the same, but I don’t have pictures of it, and I have no idea where it is. It may have gotten lost in a move, so I don’t think I’ll be making a dedicated post for it. So anyway, all the general details of my sister’s project also apply to mine, and I’ll be talking a little bit about both.
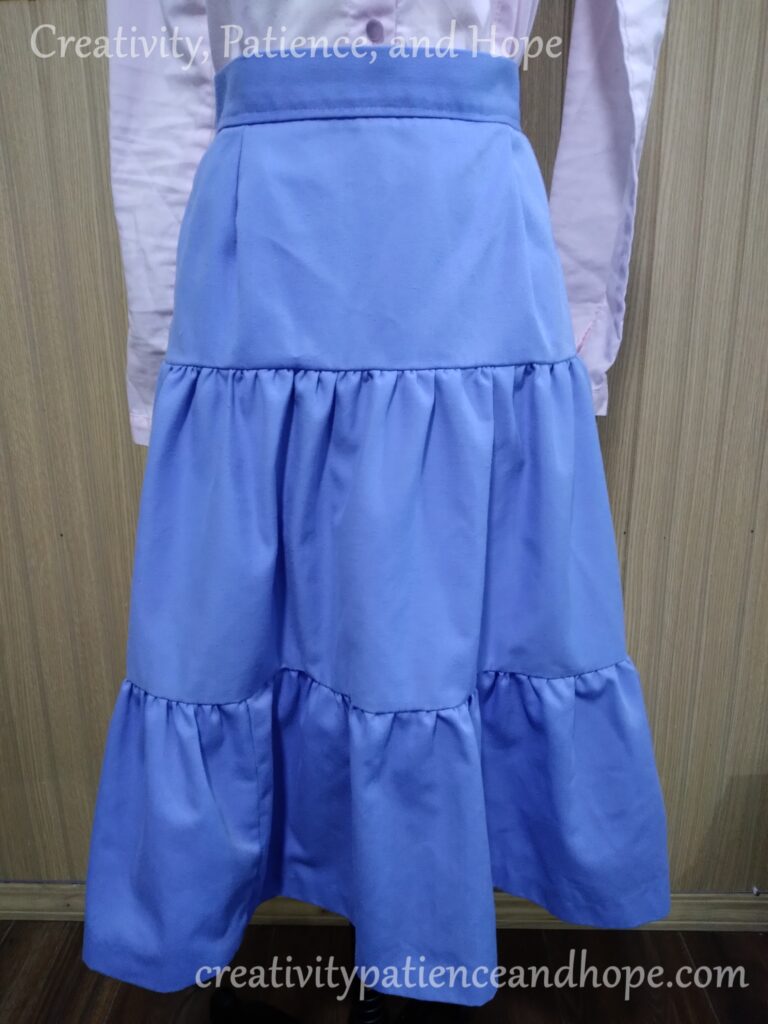
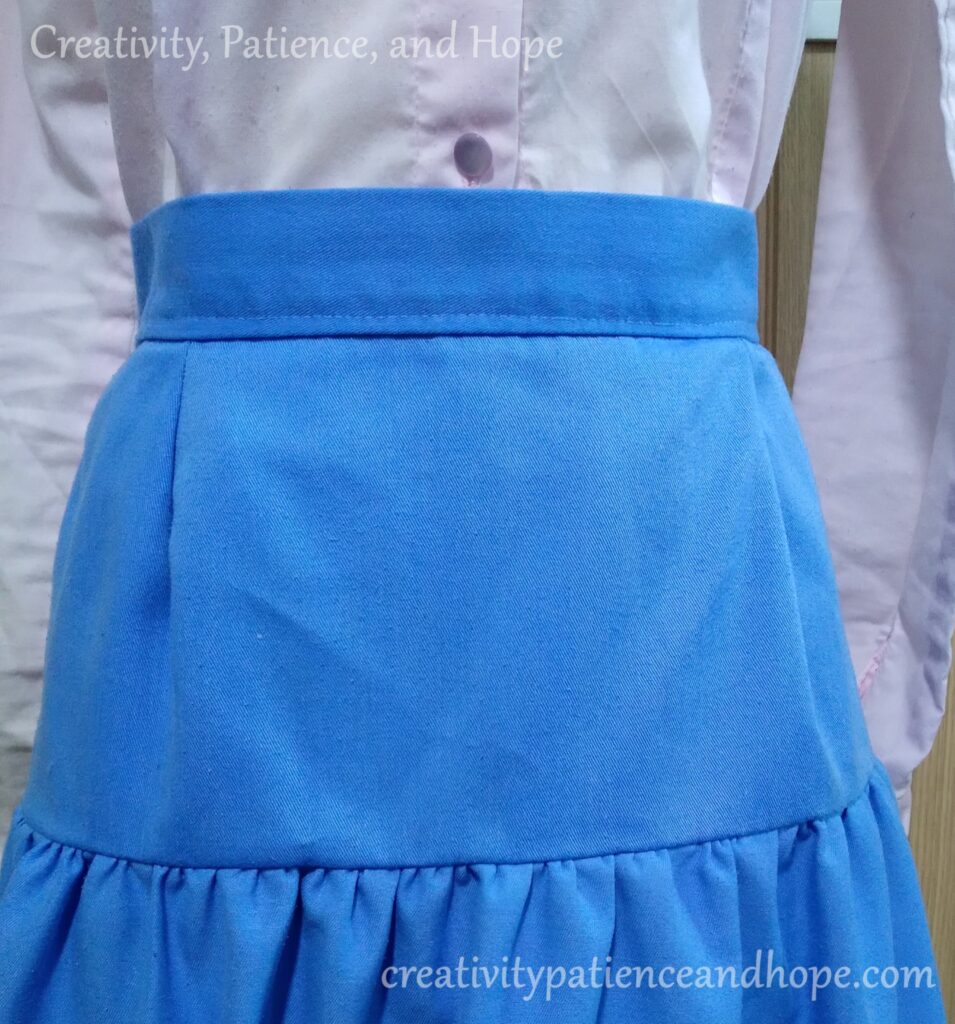
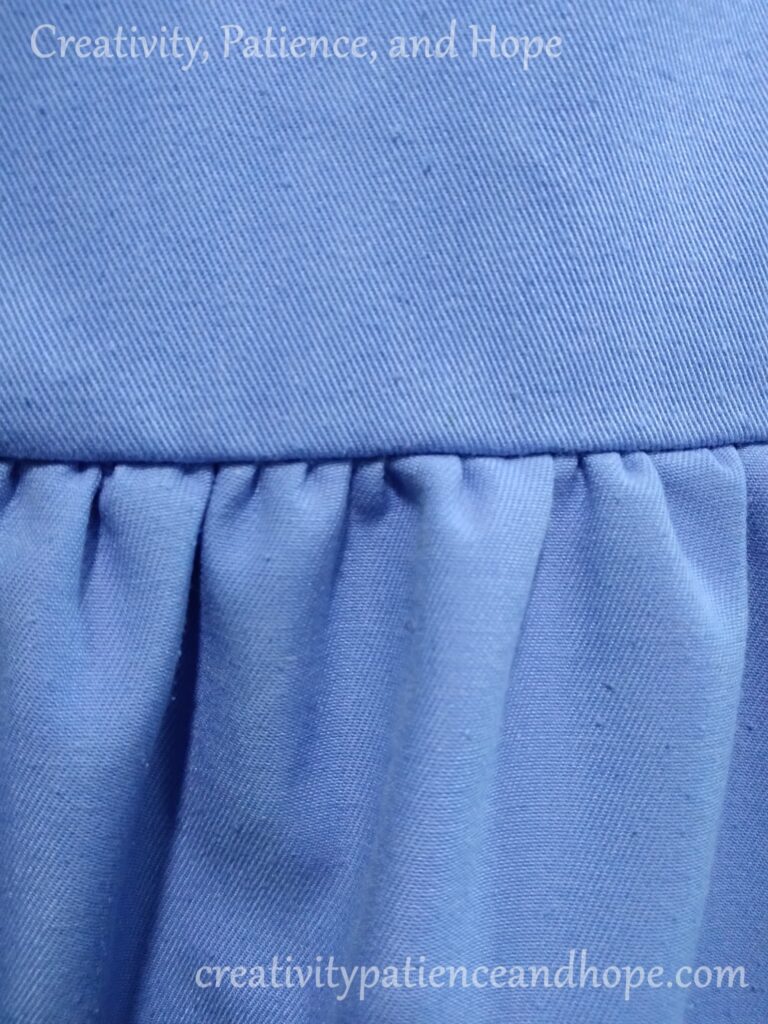
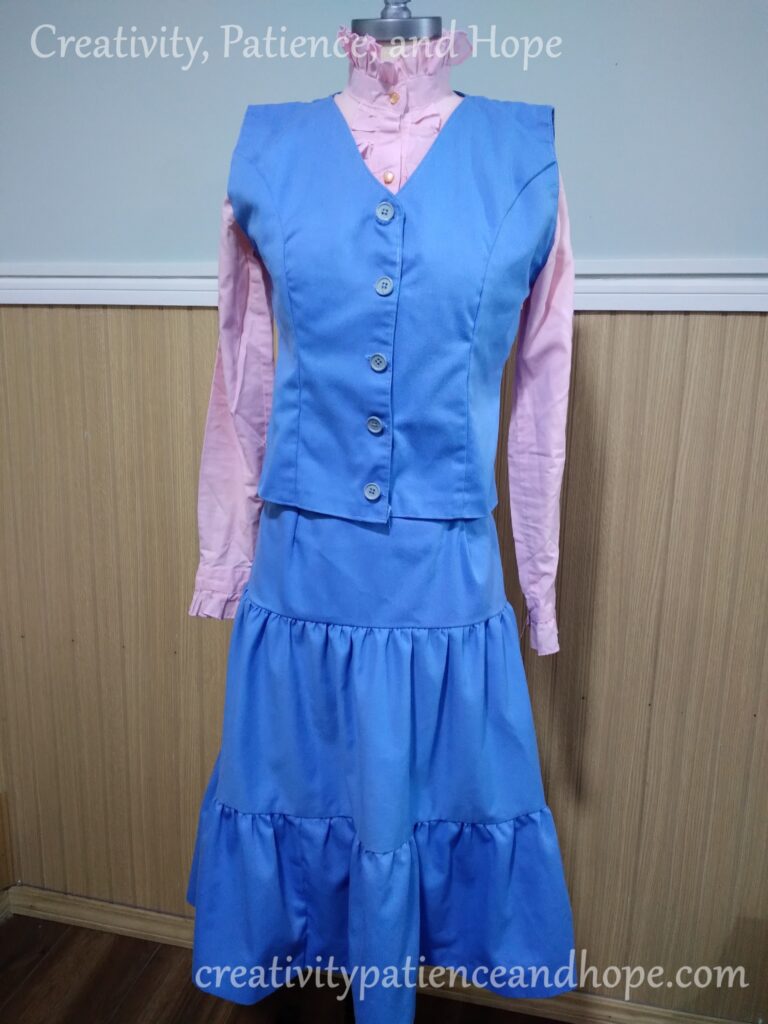
To begin, the basic shape for this skirt is as follows: an upper panel with waist darts and a separate waistband, then two ruffled tiers. The panel is made in the same way as the A-line skirt, using a pattern drafted from the hip and waist measurements. Obviously, this panel only goes to the hip. As I mentioned previously, it also has darts in front and back for waist shaping.
Then we have two tiers, each of which is a long rectangle. I don’t remember what the proportions were. It might have been one and a half to two times the length of the edge of the piece above it. This extra length was necessary to create the ruffles for a beautiful shape with extra volume. I don’t know if I’ve mentioned this before, but I really love ruffles! I also love the overall look of these tiers.
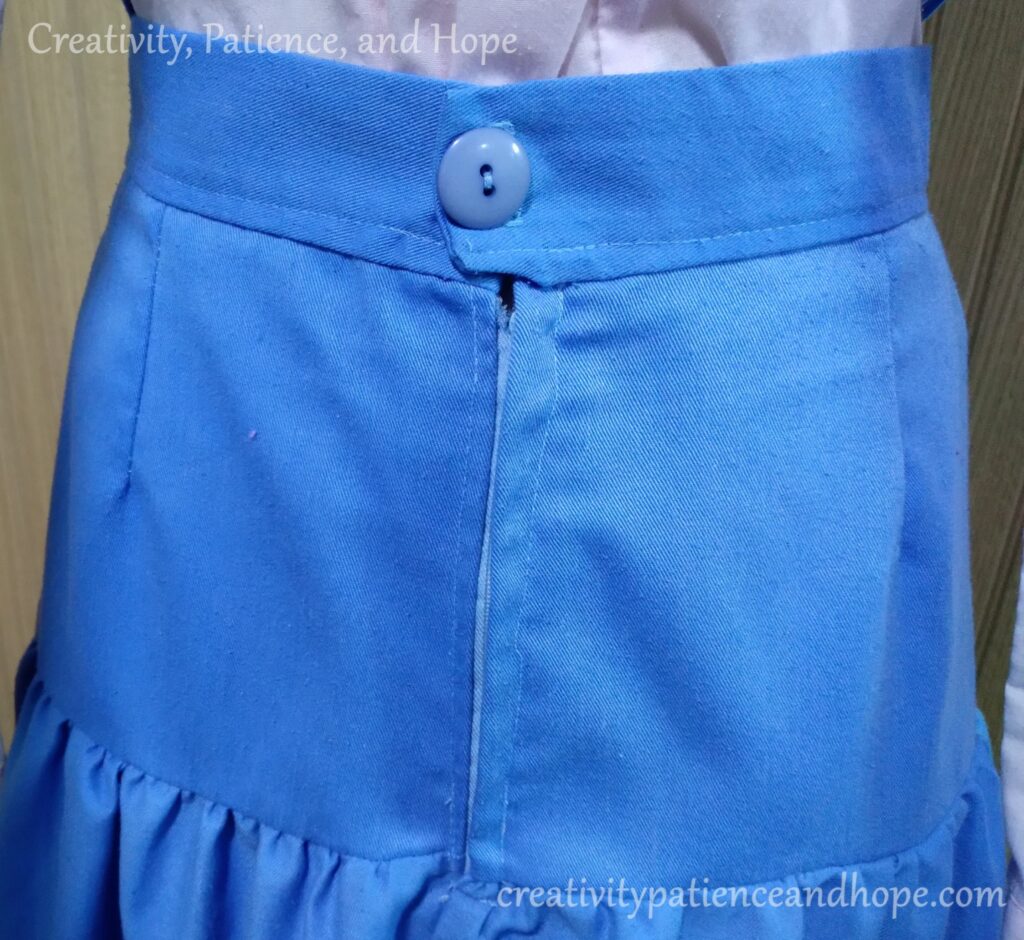
On top of the panel, the waist is finished with a separate waistband that fastens in the back with a single button. The skirt also has a zipper in the back.
Something kind of funny that I noticed with my skirt, only after I finished making the whole thing, is that one of the pieces of fabric was actually sewn in with the wrong side facing out! Now, that’s a rookie mistake if ever I saw one. After noticing that on my own skirt, I noticed that both of my sisters also had a piece of fabric sewn wrong side out on theirs! It was kind of embarrassing at first, but we later laughed about it. So it is with new skills, I guess. You live and learn.
The Matching Vest
So on to the vest now. The vest was drafted using more or less the same technique as for the button-down shirt, but with a bit more ease added in. As may be seen in the photos, the vest also has some of the same fitting issues that the shirts did, but again, being one of the first projects and using a self-drafted pattern, the fit is pretty good, considering.
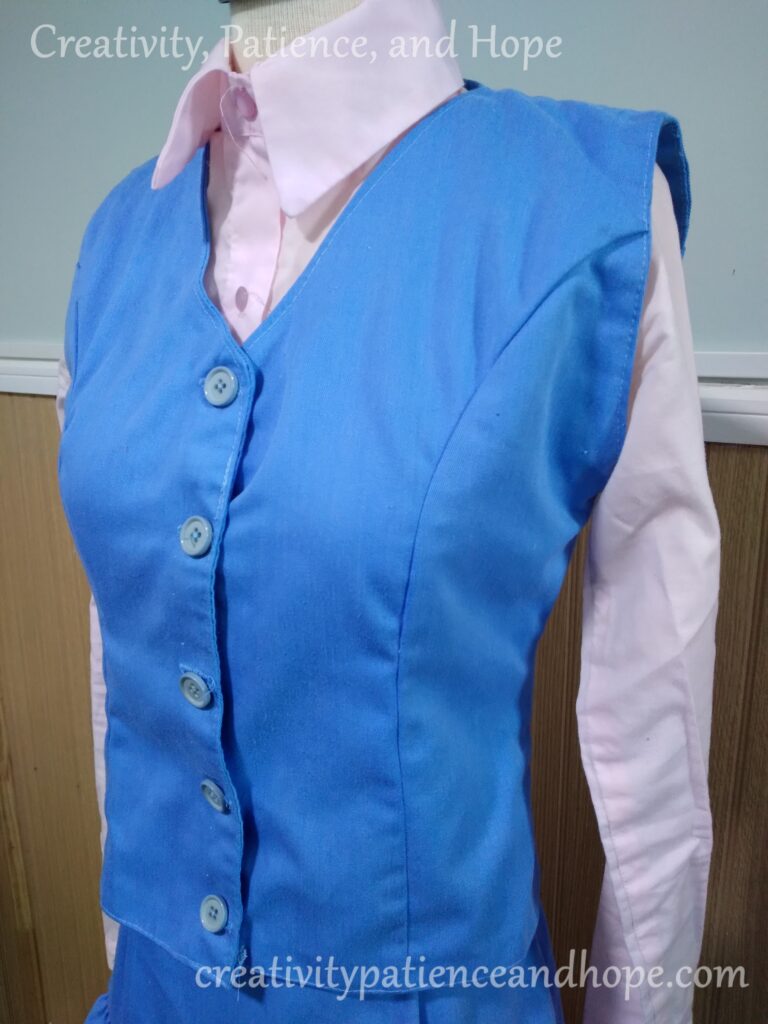
Just like the shirt, the vest has princess seams for smooth shaping in front and back, but this time, instead of going from the shoulder, they go from the armscyes.
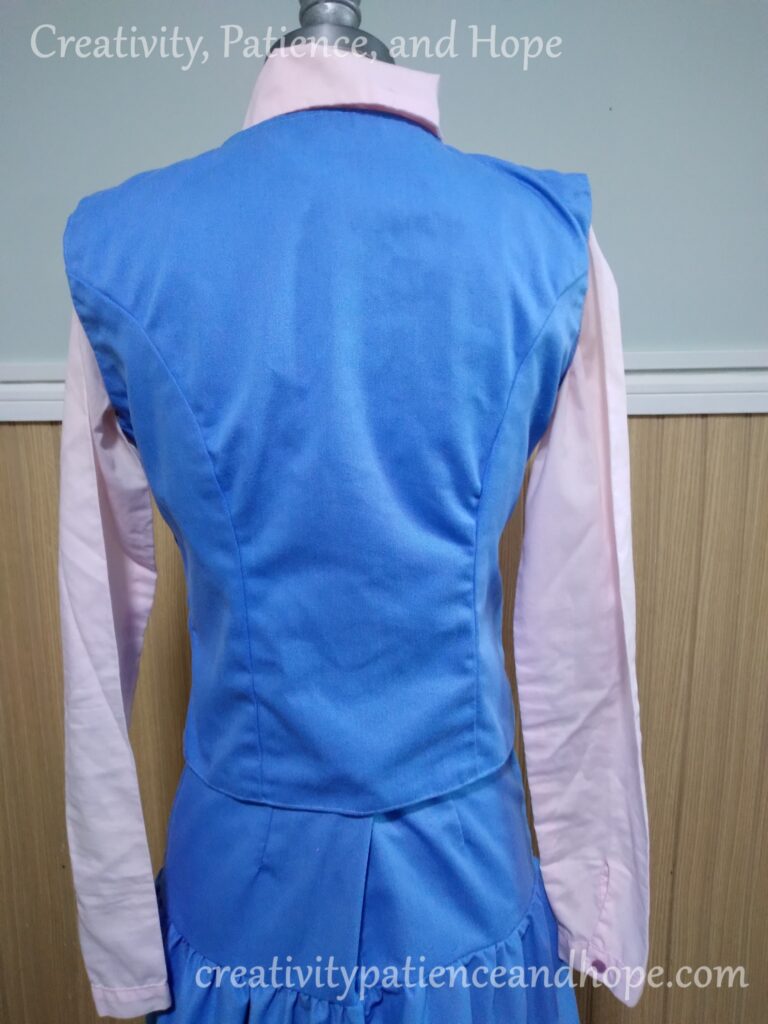
The armscyes and collar/placket are finished with facings sewn inside, and then topstitching for a finishing touch.
I notice that the bottom edge of the vest was folded up for some reason, which is not the prettiest way to finish it, as that fold is visible at the edge of the placket. Oh, well. It is what it is, and sometimes you don’t see it until you’ve advanced more in skill.
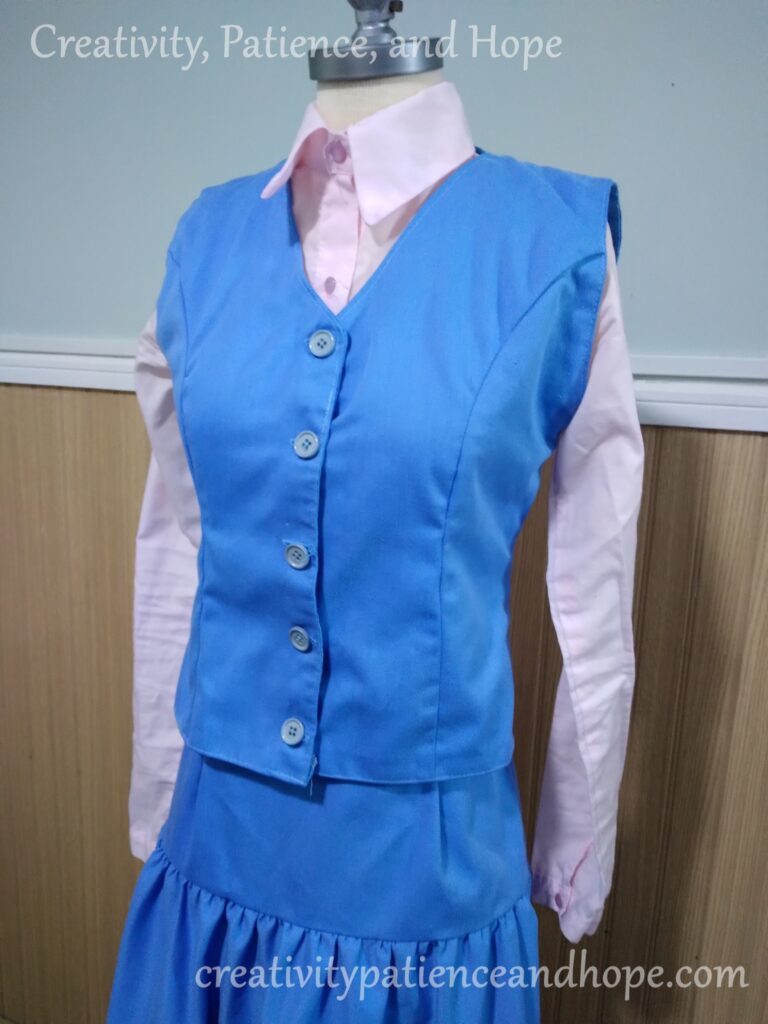
Here is my sister’s skirt and vest with the pink ruffle shirt she made next. I remember many times when she wore this, and I’m a little sad I don’t have any photos of her wearing it.
So that’s about it for this ensemble. I think it’s really cute, and my sisters and I wore ours quite a lot. At one point we got sky blue ribbons to tie around our necks for a nice accent to the look. I have to wonder what happened to my skirt, because I really liked it, even though it was a beginner project. Every so often I think about it, and recently I’ve started thinking I should make myself another tiered skirt.